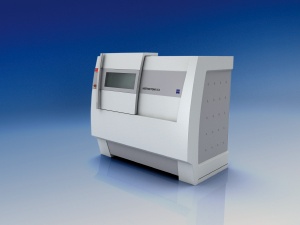
With a new member in the METROTOM® family, Carl Zeiss is once again setting standards in CT-based coordinate measuring technology: The new METROTOM 800 computer tomograph was specifically developed for 3D measurements and structural inspections of complex parts made of plastic, composite materials and ceramic. With the help of metrotomography® - the combination of metrology and tomography - this measuring system enables both the dimensional measurement of the geometry and the inspection of the interior structure of parts up to 150 millimeters. Carl Zeiss thus fulfills the expectations on extensive quality assurance of the manufacturers and users of such parts.
 The x-ray-based METROTOM 800 coordinate measuring machine from Carl Zeiss is the leading measuring system in its class for 3D measurements, material and defect analyses of complex parts made of plastic, composite materials and ceramic.
“With the METROTOM 800, we systematically implemented the ideas and suggestions of our customers in the injection molded and die-cast part industries. With its price-performance ratio, this coordinate measuring machine meets the needs of many mid-sized enterprises in the plastic and aluminum die casting industry and will lead to the further expansion of this technology," says Dr. Hubert Lettenbauer who is in charge of the large/x-ray business unit at Carl Zeiss.
The key performance features of METROTOM 800:
- The maintenance-free x-ray technology results in extremely low maintenance costs and thus minimal downtimes.
- The small focal point of the x-ray source generates razor-sharp projection images on the detector. The high physical resolution of the x-ray detector of around 3 million pixels enables very high detail recognition.
- Thanks to the combination of the familiar precise kinematics from Carl Zeiss and innovative calibration procedures, METROTOM 800 achieves measuring accuracy of 4.5 µm + L/100.
- Through the use of polymer concrete for the enclosure, the use of lead can be largely avoided. Here, Carl Zeiss demonstrates how the utilization of modern materials can protect employees, system operators and the environment - while implementing perfect measuring technology, ergonomic excellence and a corresponding design.
METROTOM 800: flexibility
The properties of METROTOM 800 enable users to reduce internal processes. The innovative metrotomography procedure makes structures on parts visible and permits metrology evaluations, which would otherwise be very time-consuming and technically involved with standard measuring technology.
With METROTOM 800, parts with difficult-to-reach structures can be quickly and easily measured non-destructively. It is no longer necessary to cover the parts with synthetic resin and gradually destroy them to be able to measure two-dimensionally plane-by-plane. In addition to dimensional metrology, the complete 3D capture of a workpiece makes it possible to compare CAD models and measurement data sets. The color-coded, easy-to-interpret display of a geometry comparison provides meaningful information about the dimensional stability of the entire workpiece. The single measuring results no longer have to be viewed and assessed to evaluate parts - another way to save time and money.
Metrotomography enables injection-molding or die-casting toolmakers to reduce the number of corrections during development. The part deviations determined by the measuring software are used to optimize the tool form. The reduction of the tool corrections leads to faster availability of the parts on the market. In addition to metrology, a non-destructive material and defect analysis - porosity analysis, material inspection and assembly checks - can also be performed using a measured data set without significant effort. Furthermore, the production process can be optimized and monitored; products are quickly and easily checked for defects.
Just like the larger model METROTOM 1500, METROTOM 800 is extremely user-friendly. Operators can start using the system after only a short training course. Those who already use CALYPSO® measuring software from Carl Zeiss can switch to metrotomography with practically no additional training and take advantage of its full functionality.
Thanks to its performance features and attractive price, METROTOM 800 is the ideal system for mid-sized operations in the plastics industry. As a result of the maintenance-free x-ray technology, users have very low running costs.